While I don't hate hills, we are not exactly best friends. I'll admit there are days when I dread conquering the beast at the bottom of my street. My girls and I prefer to travel by bike. They are getting bigger. They are growing in number, as we've just welcomed our third little girl in October. I'm getting older. I mean, just look at all these excuses. They're adding up. I don't like excuses.
For the past year or so, I've been saving pennies for an electric assist for my
CETMA to flatten the hills. There are quite a few iterations of aftermarket e-kits out there, each with their pros and cons. I've had my sights on a
Stokemonkey, which until recently had been out of production. In October 2013,
ebikes.ca relaunched the Stokemonkey. I've one mounted to the CETMA in my shed, right now. What follows is a detailed step by step of my experiences getting my bike rigged up with the 'monkey.
Below, is a list of parts and tools I used for this build.
Parts:
- Tandem stoker crankset components:
.jpg)
- Sugino XD Left Hand Front or Rear 170mm arm
- Sugino XD Right Hand Rear 170mm arm
- Sugino 26t 74 MTB Chainring
- Sugino 38t 110 MTB Chainring
- Sugino 42t 110 MTB Chainring
- Sugino 50t 110 MTB Chainring
- Sugino Single Chainring Bolt set 5/chromed steel
- Sugino Triple Chainring Bolt set
2. Shimano UN-55 Square Tapered Bottom Bracket 68 x 115mm
3. Two (2) SRAM PG-971 P-Link Bicycle Chains (9-Speed)
4. KMC Missing Link Bicycle Chain Link (9-Speed, 6 pack)
5. SRAM PG-970 9-Speed cassette 11-34t
6. Avid Juicy/BB7 Disc Brake Pads
- Stokemonkey motor with mounting bracket and clamp
- 36-72V 25A controller
- V3 Cycle Analyst
- ACS Crossfire Freewheel
- Right side twist throttle*
- Cable Tensioner
8. Half Grip Twist Throttle with Button for eBrake*
9. 36V 14Ah LiMn battery pack with 5C Samsung cells and matching 4A aluminum charger
10. Aluminum Double Decker rear rack
11. Jandd Disk Brake/Fender Adapters .75"
12. Brake Cable Housing and Ferrules
Tools: (If I've a favorite, I'll list it in brackets)
.jpg)
- Set of Metric Hex Wrenches (Pedros)
- Crank Puller (Park Tools CCP-22)
- Bottom Bracket Tool (Park Tools BBT-32)
- Cassette Lockring Tool (Park Tools FR-5G)
- 12" Crescent Wrench
- Chain Whip (Park Tools SR-1)
- 15 mm Pedal Wrench (Pedros)
- Chain Tool (Park Tool CT-5)
- 8 mm socket
- Cable Cutters
- Pliers
- Screwdriver
- Dremel with a cutting wheel or a hack saw
- Heat Gun or a Lighter
Consumables:
- Grease ( Park Tools PPL-2)
- Flux brush ( for the grease)
- Steel Wool
- 5/8" stainless screws
- #6 stainless flat washers
- Curved washers from old canti brake pads
- Rags
- 14 Gauge Primary Wire
- 14 Gauge Butt Connectors
- Heat Shrink Tubing
- Liquid Electrical Tape
- Zip Ties
Ok, now that we've got that sorted out, let's start ripping her down to build her back up. Now, I could spend a whole bunch of time detailing how to remove/install the drivetrain, disc brake pads, cassette, etc, but that's all been done before and well. Instead, do yourself a favor and get yourself a copy of one of
Lennard Zinn's maintenance books. They are invaluable. Below are some links to additional resources I've used to learn how to perform some of these tasks.
Installing the Stokemonkey:
Here's the part where you get to learn from my mistakes (my many, many mistakes). You may have noticed the * in the parts list above, next to the two throttles. You'll only need one. The throttle included with the kit does not have an eBrake button (kill switch). Ask ebikes.ca about swapping out the default throttle for the one with the eBrake button to save time and money, when ordering. Alternatively, you may order a brake lever equipped with a kill switch/eBrake. Either way, make sure you have access to a kill switch, especially if you plan to be carrying children on your ride.
1. Install the Stokemonkey clampset, loosely, on your CETMA's steerer tube, above the box mounting bracket tab. You'll be adjusting this clamp at least until the chain is on, so lightly install this clamp, for now. I must've installed and reinstalled this clampset three or four times, at various stages of the build, before I got the chain aligned decently and the cable tensioner adjusted properly. I used grease on the threads, but you may opt for Loctite.
 |
| Don't crush your tube. |
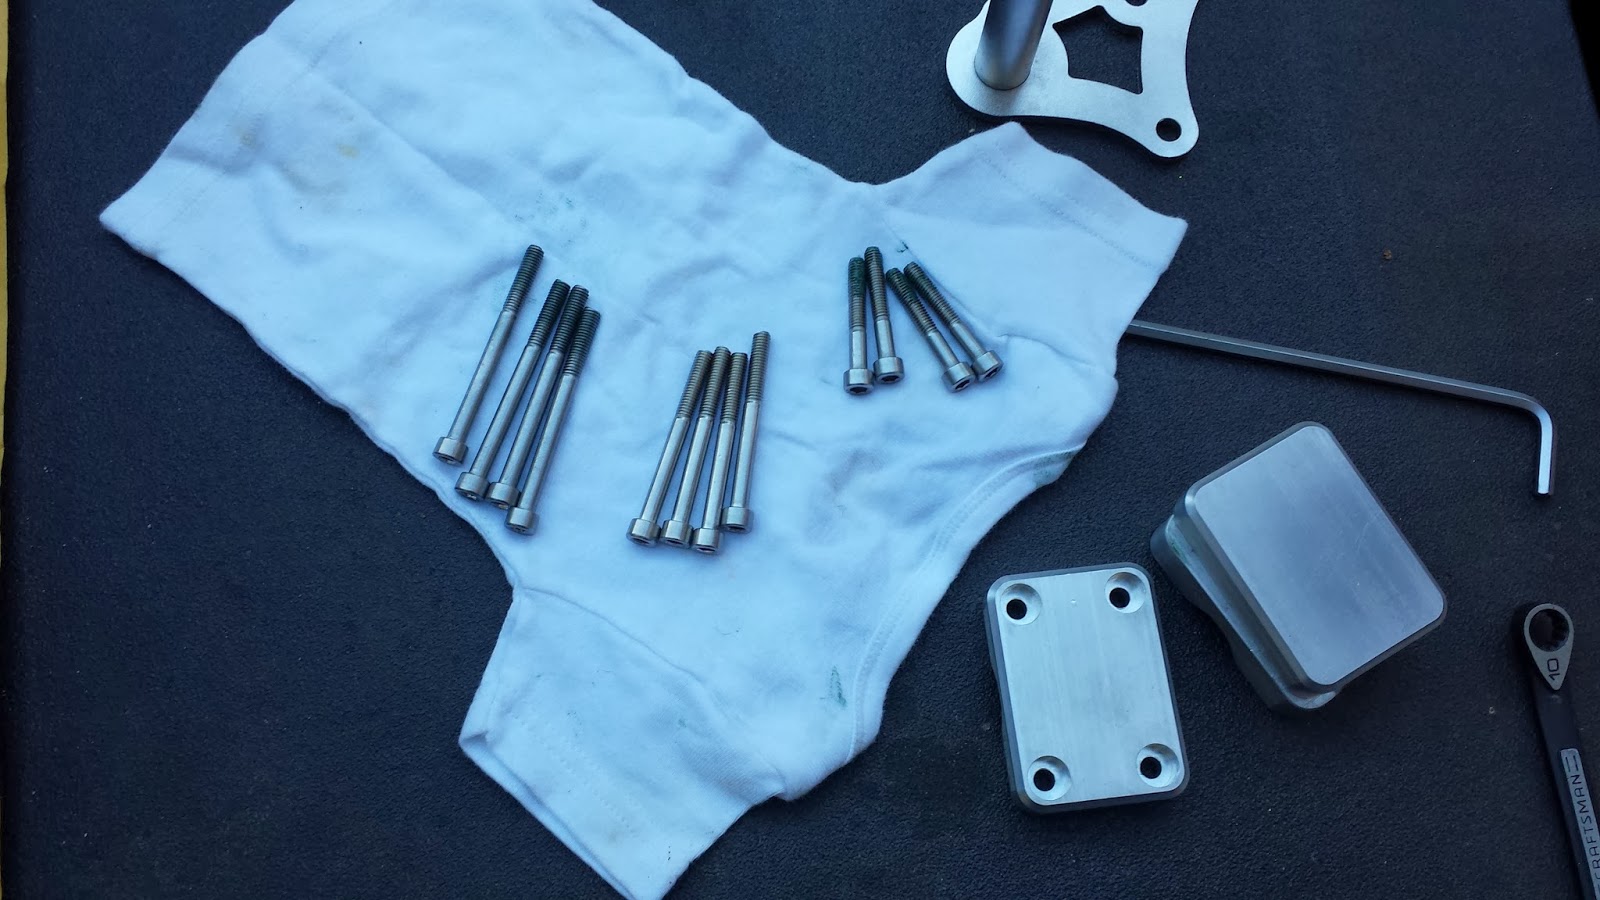 |
| I used the medium sized bolts, the third time, of course. |
2. Install the freewheel onto the motor. Grease it up, first. It installs by hand, no tools required.
3. Mount your motor. Know where you want to mount your controller, prior to mounting the motor. Ensure the cables from the motor point towards where you will install your controller. I mounted the controller on the underside of my CETMA's flat-bed platform.
4. Install the chain from the motor to your crankset. You'll need to size your chain properly. I ended up using a KMC Master Link and some SRAM chain, instead of the chain supplied with the kit. Spin the cranks and examine your chainline. You'll want a nice clean line from the freewheel to the crankset. You'll want good chain tension, too. Adjust the motor's mounting bracket left/right & up/down until you are satisfied, then tighten up the bolts on the motor mount (but not too tight...).
 |
| Lousy chainline. |
 |
| Decent chainline. |

5. Install cable tensioner. I felt the included housing was too short and it's ferrules would scratch the paint, so I installed a longer run of housing and new ferrules. Use an 8 mm socket to lock the cable down.
 |
| Short vs Long brake cable housing. |


6. If you're going to use a rear rack, as I do, install it now. I found the double-decker rack I'd ordered wouldn't clear my disc brakes. I used one 0.75" Jandd Disk Brake/Fender Adapter, in order to clear the brake mechanism. I installed only one of the two Jandd adapters because I didn't want to flex/bend the aluminum rack more than was necessary to get it installed. The end result is that the rack is off-center a little bit, big deal. I've found the bigger issue to be the weight of the battery on the rack, as it is pretty high up on the back of my bike, and it harshes my ride. I'm not sure how to describe it other than turns aren't as fluid with the battery up high in the back, as turns are without it installed or when the battery is installed lower on the platform or in the box up front. I also needed to cut the rack's struts, which connect to the seat stays, to make the rack fit my CETMA.
7. Slide the battery into the rack.
8. Mount the controller. Make sure the power cable from the controller will reach the battery, from your desired mounting point. I needed to add approximately one foot to the length of the power cable in order to mount everything where I wanted it. I used 14 gauge wire and butt connectors, to do so. I sleeved the splices with pieces of heat shrink tubing and finished them off with liquid electrical tape to be sure they would stay watertight.

To mount the controller to the underside of the flat-bed platform, I used 5/8" stainless screws, #6 stainless washers and recycled some rounded washers from old canti brake pads I'd replaced. It's a nice secure fit. I'm not worried about any of the connections getting wet, as they're well shielded from the elements under the box, but I still plan to hit them with some heat and liquid electrical tape, just to be sure.
9. I've installed the Cycle Analyst on the down tube. It's out of the way and visible, yet not overly conspicuous.
10. Install the throttle with eBrake button on the right side of your handle bar.
 |
| Green means stop, obviously. |
11. Wire it up. This is where I stumbled most. Most of the connections are straightforward, male to female connector connections. There are really only two connections one could screw up. Yup. I missed 'em both. A couple of emails to and speedy replies from the extremely knowledgeable and helpful staff at ebikes.ca and I was able to sort out my errors: Make sure you connect the three pin connector from your throttle to the BLACK three pin connector from the controller, not to the white one. The other connection I missed is from the controller to itself, a white wire to the ground, creating a ground to short. This white to black connection controls the direction of the motor. Disconnected, the motor will spin in a direction that will not spin the freewheel. Once the white is connected to the black ground wire, the motor spins in the direction needed. I've the speedometer cable and magnet running to the rear wheel. Use zip ties to secure your connections to your frame.
 |
| White to Ground. Blue to ...meh, who needs Blue, anyway? |
12. Configure the Cycle Analyst. I've V3 of the Cycle Analyst (CA). The "Unofficial User Guide" for the CA V3 may be found
here. You'll need to read and become familiar with this manual. It is very helpful. Section 3.5 of the manual details the
minimum set of baseline configurations you
must complete. I chose my in/out throttle to be controlled by Voltage.
13. Enjoy!
I now have a functional ebike. I still need to play with the CA configuration a bit to dial it in more. I've not got the speedometer working yet, but I believe that's because of the distance between the sensor and the magnet. I plan on replacing the standard magnet with a rare earth magnet from an old IDE hard drive. We'll see. I've ridden it about 70 miles since I've rigged it up. I tend to use it mainly on hills and to get up to speed from a dead stop in traffic. It has performed admirably. I've only charged it up once and have well over half a charge remaining.
I hope this helps you get up and running easily and to avoid some of the hiccups I'd experienced. Let me know if it helped you out and/or if you've any suggestions to streamline and/or improve the install and configuration. I'll post a follow up review in the not too distant future.
Ride on.
 |
| Maiden voyage for beer and burger, on 12/2/2013. |
ps,
More photos from the install may be found
here.


.jpg) 7. Stokemonkey kit:
7. Stokemonkey kit:


 During Bay State Bike Week, I won the 1st ever Pack Mule Award. I've got to admit that I was psyched! I sent in some pics of the CETMA loaded up with fruit and kids from the JP Bikes Spring Roll. The award was sponsored by Light & Motion and Kryptonite. I got some fantastic swag!
.jpg)


